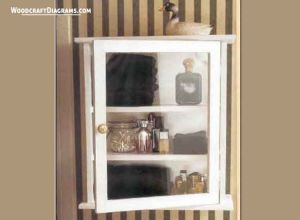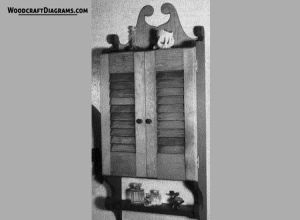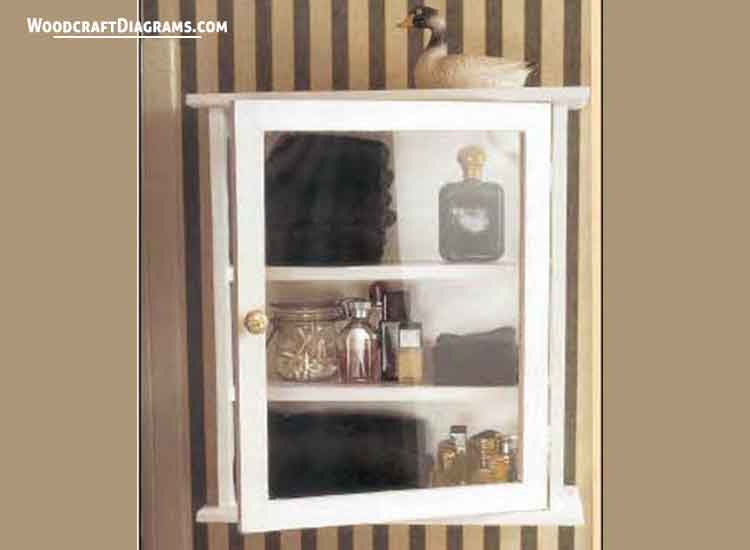
The bathroom cabinet plans and blueprints will help you build a medicine chest and practical display case that will last a long time.
Building The Sides
Each of the two sides of the cabinet, and the door is a 1 x 2 frame which has been slotted in the center in the center to accommodate a piece of glass.
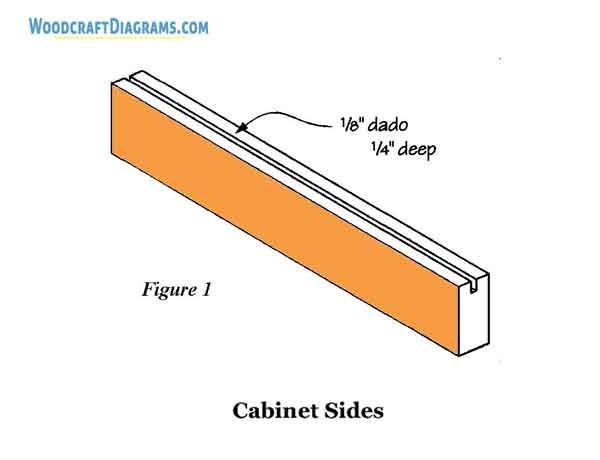
Dado a total of 18 linear feet of 1 x 2 pine down the center of one edge the width of a saw kerf (about 1/8”) and ¼” deep, as shown in Figure 1.
This may be done with a circular saw with a ripping fence, a table saw, or a router with a 1/8” straight cutter.
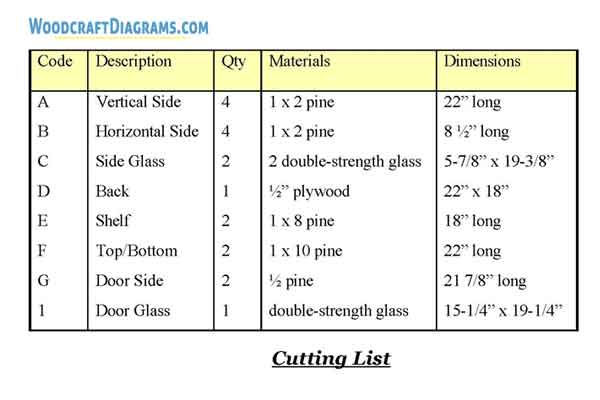
Cut four vertical sides (A) from the dadoed 1 x 2 pine, each measuring 22 inches long.
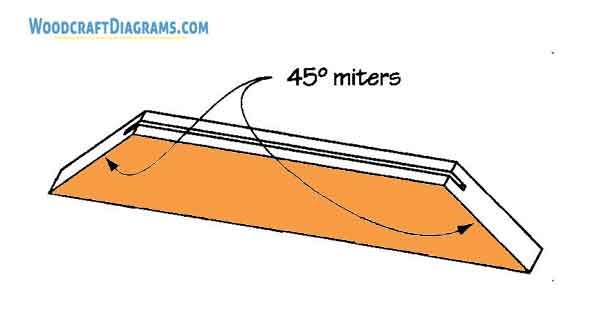
Miter each end of the four vertical sides (A) at opposing 45-degree angles.
Make certain that the dadoed edge is on the short side of each piece.
Cut four horizontal sides (B) from the dadoed 1 x 2 pine, each measuring 8-1/2 inches long.
Miter each end of the four horizontal sides (B) at opposing 45-degree angles, as shown in Figure 2.
Again, make certain that the dadoed edge is on the short side of each piece.
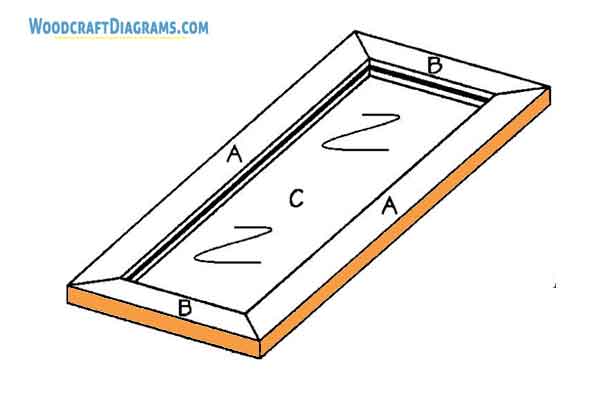
Place two vertical sides (A) on a level surface, parallel to each other and 5-1/2” apart, as shown in Figure 3. Fit two horizontal sides (B) between the ends of the vertical sides (A),
matching miters.
Fit one side glass (C) into the dadoes cut in all four sides. Make certain that the assembly is square. Apply glue to the miters, and, and use corrugated fasteners
across each of the corner joints to secure them.
You may choose to clamp these pieces together while you drive 1-1/2” 4d finishing nails into the edge near each corner and across the miter joint. Use two opposing nails at each joint.
Repeat Step 6 to assemble a second cabinet side.
Completing the Cabinet
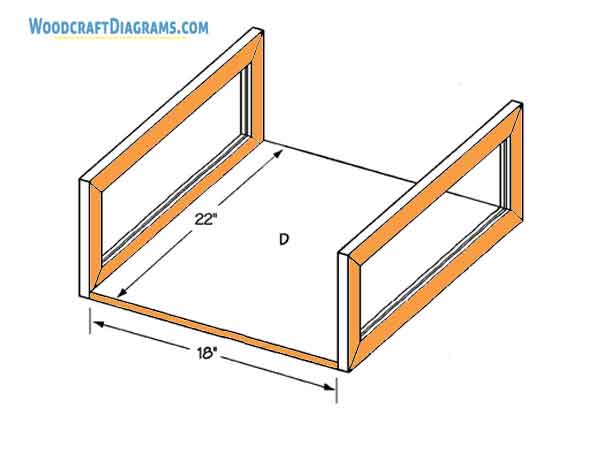
Cut one back (D) from ½” plywood, measuring 18 x 22 inches.
Place the two assembled sides on edge on a level surface, parallel to each other and 18 inches apart. Place the back (D) between the two sides, matching the 22-inch-long edges, as shown in Figure 4. Screw through the vertical sides (A) into the edges of the back (D) using five 1-1/2” screws on each joint.
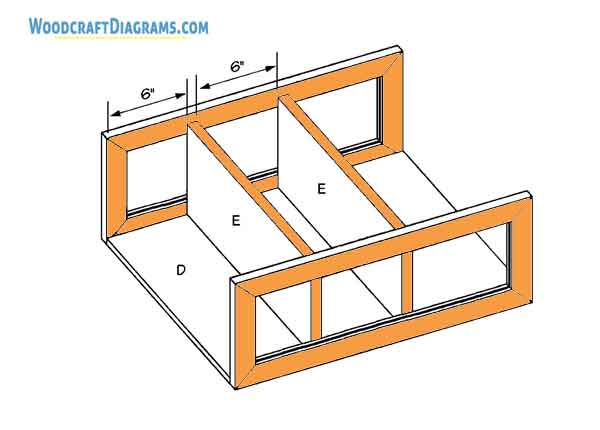
Cut two shelves (E) from 1 x 8 pine, each measuring 18 inches long.
Fit one shelf (E) between the two side assemblies, 6 inches from the bottom of the cabinet, and flush against the back (D).
Nail through the cabinet vertical sides (A) into the shelf (E) using two 1-1/2” 4dfinishing nails on each joint.
Repeat to attach the second shelf (E) 6 inches above the first, as shown in Figure 5.
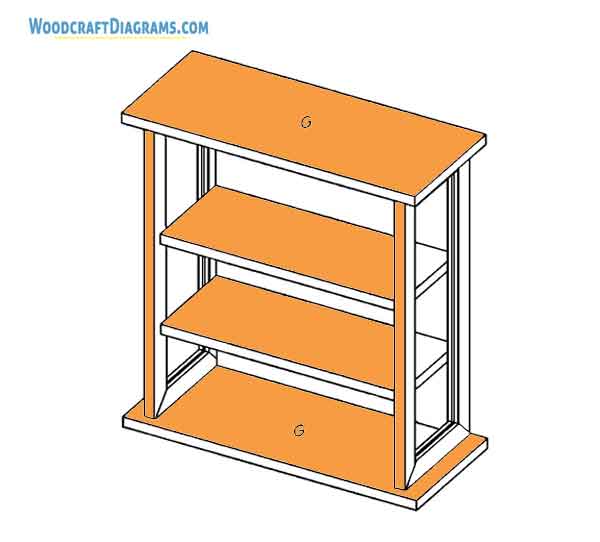
Cut two top/bottoms (F) from 1 x 10 pine, each measuring 22 inches long.
Each of the top/bottoms (G) will be centered side-ways on the open ends of the cabinet assembly and placed flush with the back of the cabinet as shown in Figure 6.
Apply glue to the ends of the side assembly and the edge of the back, and nail through the cabinet top/bottoms into the edges of the back and side assemblies, using 1-1/2” 4d finishing nails spaced every 4 inches.
Making the Door
The cabinet door, like the sides of the cabinet, is a 1 x 2 frame which has been dadoed in the center to accommodate a piece of glass.
Cut two door sides (G) from the remaining dadoed 1 x 2 pine, each measuring 21-7/8” long.
Miter each end of both door sides (G) at opposing 45-degree angles, as shown in Figure 2.
Make certain that the dadoed edge is on the short side of each piece.
Cut two door top/bottoms (H) from the dadoed 1 x 2 pine, each measuring 17-7/8” long.
Miter each end of both door top/bottoms (H) at opposing 45-degree angles, as shown in Figure 2.
Again, make certain that the dadoed edge is on the narrow side of each piece.
Place the two doors sides (G) on a level surface, parallel to each other and 14-7/8” apart, in the same manner as shown in Figure 3.
Fit two door top/bottoms (H) between the ends of the door sides (G) matching miters.
Fit one door glass (I) into the dadoes cut in all four pieces.
Make certain that the assembly is square, and use corrugated fasteners across each of the corner joints to secure them.
You may choose to clamp these pieces together while you drive 1-1/2” 4d finishing nails into the edge near each corner and across the miter joint.
Use two opposing nails on each joint.
Finishing
Fill any screw holes or imperfections in the wood with wood filler.
Thoroughly sand all of the wood parts on the completed bathroom cabinet.
Stain or paint the bathroom cabinet the color of your choice. We painted our cabinet a bright white.
Install the drawer pull on the bathroom cabinet door.
Use two cabinet hinges to attach the door to the bathroom cabinet.
It will be necessary to chisel out a thin rectangle of wood, the length of the hinge and slightly less deep than the closed hinge is thick, on the edge of the cabinet door to accommodate each of the cabinet hinges.
If necessary, install a small magnetic catch to keep the door closed.
You may hang your bathroom cabinet by screwing directly through the back into studs in an appropriate wall, as we did. If you cannot find suitable studs, use molly bolts to anchor the
cabinet securely.